Slime is HUGE with kids these days. What used to be a fun science experiment to show chemical reactions, is now a trend that doesn’t show any sign of slowing down!
And what’s not to love about slime?! It’s fun. It’s sensory. It’s slimy. And it’s a great activity for the whole family to get into together.
** This website contains affiliate links. If you make a purchase using one of these links, I may earn a commission. Please click here for more information about cookies collected and our privacy policy **.
The following is a super simple slime recipe with no funky or scary ingredients- your kids can make it themselves. My kids wanted “fire slime” so that’s what it’s called!
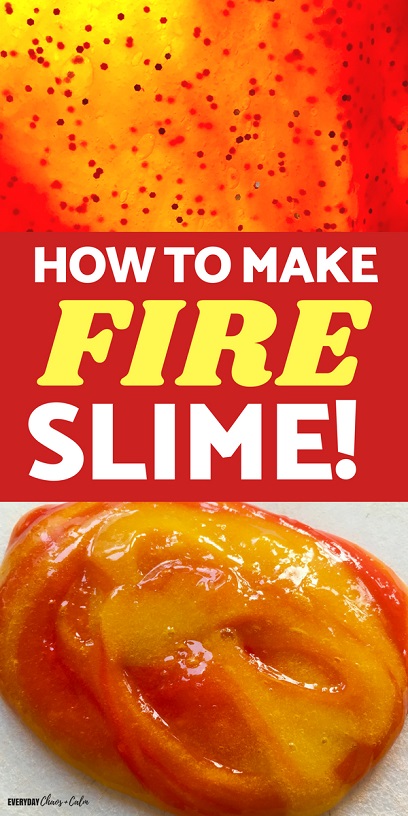
How to Make Fire Slime- A Simple Slime Recipe for Kids
Years ago when I first made slime with my now teenagers as part of science class, we used borax…which I will be honest, I didn’t really want them doing the mixing and handling of.
But this slime uses a newer recipe that seems much safer for kids to handle all on their own.
We made this slime with kids ranging from 2 to 12 years old- and everyone had an equally fun time. My 2 year old had a little help in the stirring department from his older brother.
So let’s get to it. All you need to make this super simple slime recipe is:
- 1 1/2 cups of clear glue (divided)
- 6 tsp baking soda (divided)
- 3 T contact solution
- red, orange and yellow food coloring
You will also need 3 bowls, 3 spoons, and your measuring spoons/cups.
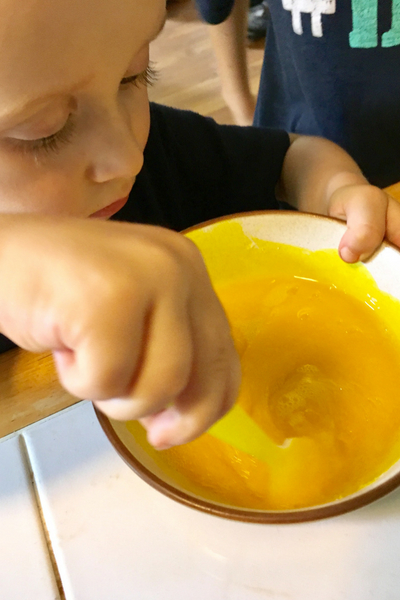
Start by placing 1/2 cup of glue in each of the 3 bowls. Add 1-2 drops of food coloring, one color per bowl. We used paste food colors, you may need a few more drops if you are using liquid colors.
Stir in the coloring until it is uniformly mixed.
Add in 2 tsp of baking soda into each of the bowls. Again, stir well until the baking soda is all mixed in.
Now it’s time for the chemical reaction! (sorry, science nerd in me loves this kind of stuff!)

Finally add in 1 T of the contact solution into each of the bowls and stir. Your mixture should almost immediately turn to a solid mass!
Keep stirring to mix in as much of the solution as you can, then switch to your hands.
Knead the slime until it is smooth and no longer sticky. Moving your hands quickly as you knead will prevent them from sticking too much.
You can also sprinkle a tiny bit more baking soda on your slime, don’t over do it though, or it might get tough.
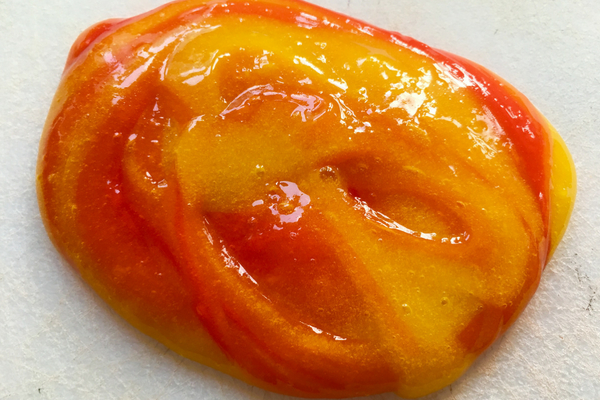
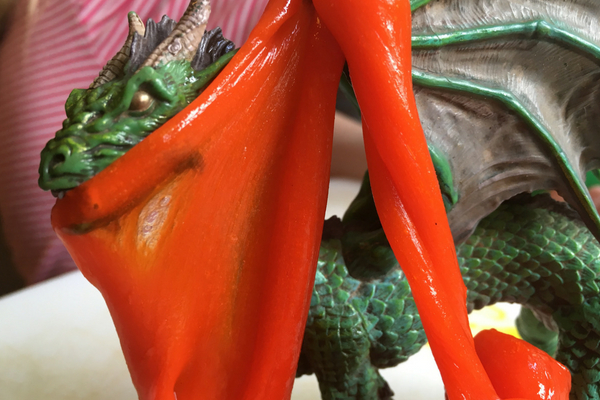
Now you should have 3 colors of slime- red, yellow, and orange. Now it’s time to mix!
I was working with 4 kids, so we divided each of the balls into 4ths and gave each person one ball of each color.
Roll each color into a snake and lay them side by side. Pick them all up and hold from one end above your surface, allowing the slime to pull and stretch with gravity.
With each new mix your colors will mix more and more so that it looks more shimmery and fiery!
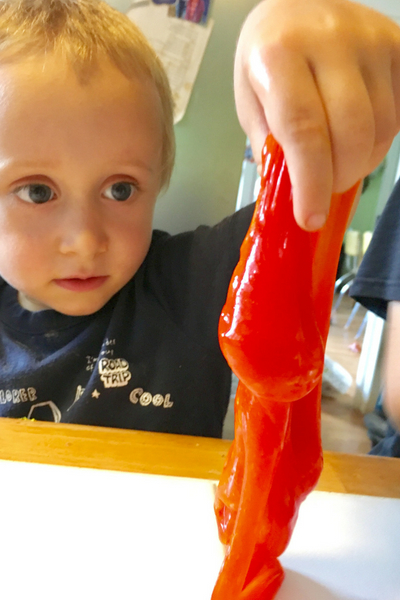
Now just let them have fun! Kneading and stretching is great stress relief!
See how long your slime can stretch. How thin can you stretch the slime? Thin enough to blow a bubble in?
Have your child observe how it holds it’s shape. How quickly it takes the shape of a new container or how quickly things like hand prints disappear.
And don’t forget- this is fire slime- so there’s got to be some fire breathing dragons and mighty knights that make an appearance!
The Science of Slime
Learning can be fun! Here are some of the things your kids can learn while playing with slime:
- Vocabulary like chemical reaction, polymers, non-Newtonian fluid, state of matter,
- Exploration of states of matter and how slime acts as both a solid and a liquid under different conditions
- You can read more about the science behind slime so you are ready to answer questions and encourage discussion
Want more sensory science fun? Try making this mess-free Oil and Water Sensory Bag!
More Slime Recipes:
What is that 1 T???????? What does this T mean? How much is it? Tablespoon? Teaspoon or what?
T is the abbreviation for tablespoon, tsp is the abbreviation for teaspoon
This will be my first time making slime. How do you store it?
Hi, super nice! Please, can I replace contact Solution by saline? (Soro fisiológico)? Thanks
is this how slime rancher fire slimes are made