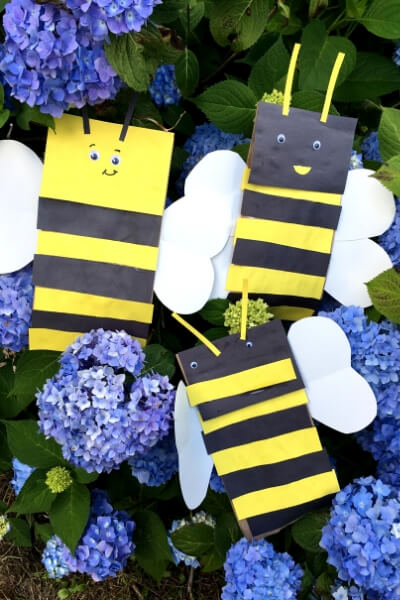
Are you looking for a simple craft to do with your kids? Try making this easy paper bag bee puppet! It’s great for preschoolers or as part of unit study on bees or insects!
Crafts are a fun way to bring learning and the world around you to life!
** This website contains affiliate links. If you make a purchase using one of these links, I may earn a commission. Please click here for more information about cookies collected and our privacy policy **.
Bringing the outside world inside for crafts helps to make things like bees less scary and helps kids learn about everything bees do for our world.
This paper bag bee puppet is super easy and can be done with little to no prep with supplies you probably already have on hand. Handmade puppets are great for adding to your pretend play or dramatic arts area, so kids can role play as they process information they learn about bees!
I’ve also includes ideas on how to extend this beyond just a craft to help teach your kids more about bees!
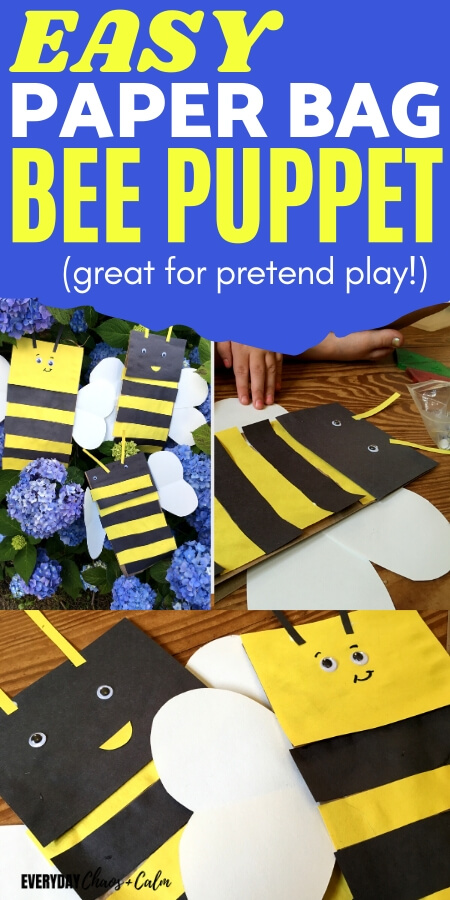
How to Make an Easy Paper Bag Bee Puppet
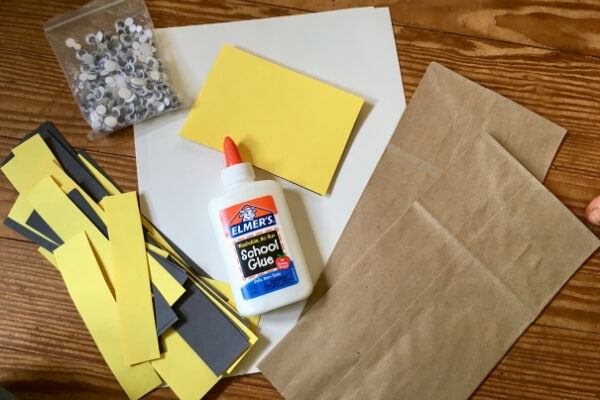
For each puppet you will need:
1 small paper bag (lunch size bags)
1 piece of black construction paper
1 piece of yellow construction paper
1 piece of white construction paper
You will also need a pair of scissors and glue to put the puppet together.
Putting Together Your Paper Bag Bee
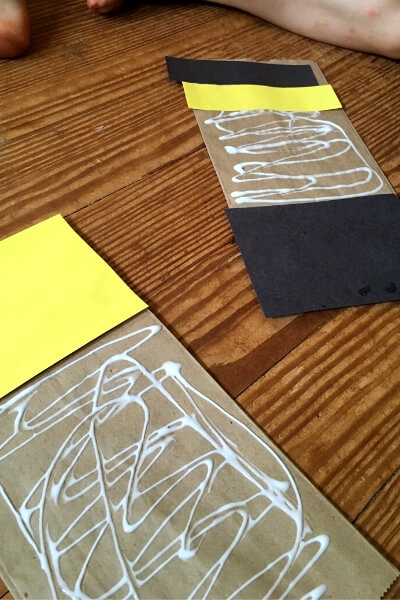
Start by placing your paper bag on top of your yellow and black paper to measure how wide you need to cut the stripes. Cut the paper to this width and set aside the extra smaller piece for the face.
Cut the wider pieces of black and yellow paper in to strips about 1 inch wide.
Take the smaller pieces and decide which color you want to use for the face. Use the bag again to measure how wide the piece needs to be and trim off the excess.
Place the bag on your surface so that you can see the bottom facing up. This will be the face of your bee puppet.
Using a small amount of glue (around the edges and a little in the middle), glue down the piece of paper you cut for the face. Be careful when you are gluing- you don’t want to accidentally glue down the folded flap that will be the bee’s mouth!
Then it’s time to start the stripes.
It doesn’t matter which color you start with, and while it’s great to get the pattern of YELLOW-BLACK-YELLOW-BLACK, it’s more about the process for kids.
So if they don’t want to make that pattern or mess it up in someway, that’s fine! (Read more about the RIGHT way to do crafts with kids for more of my thoughts on the subject)
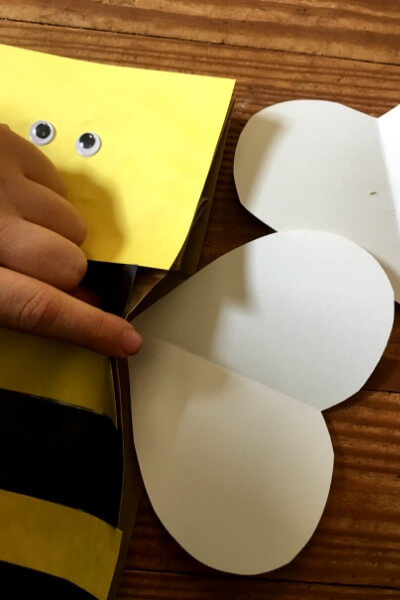
I think it’s best to start at the top and work down, but that’s personal preference. As you can see pictured above, my son started his at the bottom. Lift the flap just a bit and glue your first stripe so that it starts a little under the flap. Then continue gluing black and yellow stripes until you have covered the entire length of the paper bag.
Don’t use too much glue or the bag will get soggy! I know- kids love to overuse glue, but this is a great time for them to learn to moderate!
Now it’s time for wing, eyes, and antennae!
Take 2 googly eyes and attach them to the face. We have a large multi-pack of self adhesive googly eyes that we use for all sorts of projects (and it’s totally okay if your kids want to make a bee with LOTS of eyes!)
Next cut out your wings. We used heart shapes for wings, but circles or ovals would work too. I double folded my paper so that I could cut out 2 hearts at once that were identical size and shape.
To attach the wings, open the sides of the bag just a little and glue or tape the corners of the hearts inside. One of each side.
And finally, cut 2 narrow strips of black paper about 2-3 inches long out of some of your scraps. Glue these to the top of the head, just above the eyes for your antennae.
Feel free to draw a mouth or cut one out of scrap paper and glue it down.
And that’s it! Just give it a few minutes to dry and it’s ready to use!
Ideas for Extending this Bee Craft
Crafts are great and a lot of fun, but what’s better is to extend the crafts- either before or after- to help learn and have more fun!
Here are a few ideas for extending this bee craft:
Take the bees on a tour of your yard or park. Gather your bees and take them outside. Place your hand inside the bag and use your fingers to open and close the mouth. Take them to visit flowers that might be blooming in your yard. Talk about pollination, honey making, and other “bee jobs” with your kids. Let the kids act out and pretend play that they are bees.
Read books about bees (with YOUR bee). Here are some to choose from:
- Explore My World: Honey Bees (National Geographic)
- Bee: A Peek-Through Picture Book
- Give Bees a Chance
- The Honeybee
You can even read these books with the puppet on your hand. Have the bee “read” and act out the book as you read.
Observe real bees. Take a walk outside to look at real bees. How many do you see? Do they look like the bee you made?
You May Also Like These Kids Crafts:
Crumpled Tissue Paper Rainbow Craft
17 Fun Space Crafts and Activities for Preschoolers