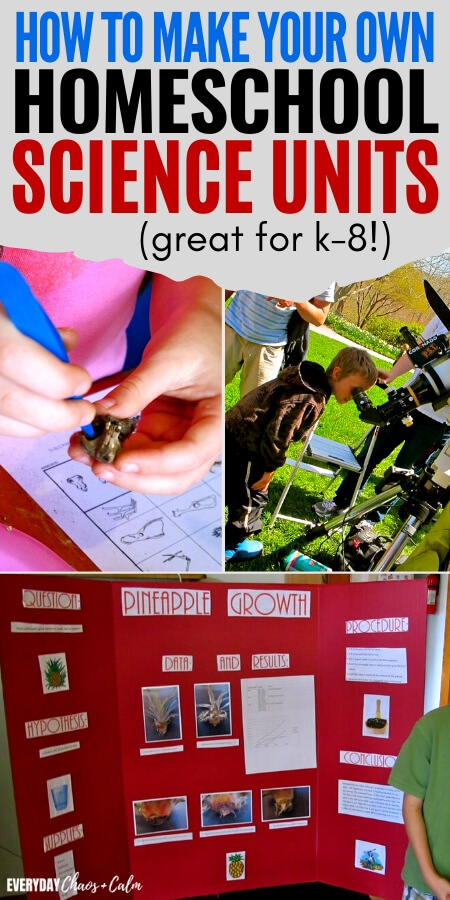
Are you having trouble finding the perfect science curriculum for your kids? Make your own! Here’s how to make your own homeschool science unit studies that are perfect for your individual family!
I love science and so do my kids! But when it came time for official homeschool science lessons I was less than thrilled with my choices.
** This website contains affiliate links. If you make a purchase using one of these links, I may earn a commission. Please click here for more information about cookies collected and our privacy policy **.
Science is something that happens naturally in life. You don’t need a text book or workbook to learn about how seeds grow and the parts of a plant when you can plant a garden instead.
You don’t need workbook and paper to study the life cycle of a butterfly. Instead use real caterpillars and butterflies.
So if you are like me and are less than thrilled at the quality of premade homeschool science curriculum, let me show you how to create your own homeschool science unit studies instead.
A note before we begin, these homemade units are best for elementary and early middle school grades. Homemade science units can be used for high school as well, but you will want to be sure you are creating something complete and cohesive that is worthy of a high school credit, especially if your child plans on going to a university after graduation.
So, how do you write your own science unit? It’s really not that hard. It just takes a little time, some trips to the library, a few google searches, and some creativity.
How to Create Your Own Homeschool Science Unit Studies
Step 1: Pick Your Topic
Before you can even begin to plan your own homeschool science unit study you need to narrow down your topic.
You can go about this in a few ways:
- Check out grade level curriculum standards and pull main topics out to study individually
- Ask your kids! What are they passionate about? What do they want to study the most?
- Look at the What You 1st,2nd, 3rd…Grader Needs to Know type books for ideas
- Choose what excites you!
Once you have a list of topics, or even just one topic, you are ready to move to step 2.

Let your kids own their education by giving them research and presentation projects that require them to test, collect data, and present their findings.
Step 2: Create a Basic Timeline
Once you have your topic you need to plan out some specifics, such as:
- How long are you going to spend on this topic?
- How many days a week are you going to devote to science?
- How many hands-on experiments or demonstrations do you want to include? (One a day, one a week, etc)
- Will there be book work too?
- Do you plan on doing any big projects? Such as research or science fair type projects.
- Will you include other subject areas in your plan (language arts, history, math, etc)
It is important to get these little details down first, as it will help you immensely when it comes time to actually write your lessons.
You don’t have to be specific in this step- it doesn’t matter what the projects, assignments, and activities are, you just want to get an idea of how many activities and assignments you need to create.
This step is very important if you are planning a year worth of science units and you need to make sure everything you want to cover will fit in the time allotted.
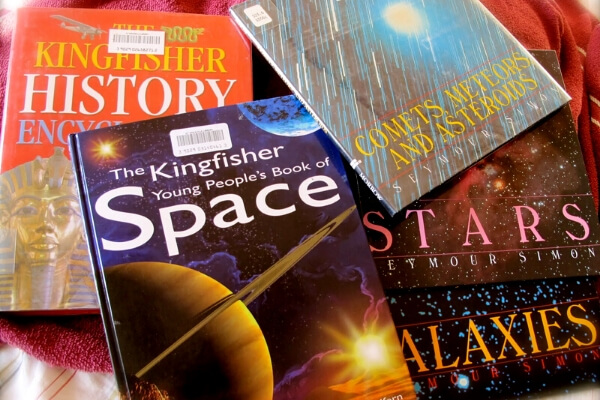
Step 3: Go to the Library
Books are essential to learning. And I am not talking about textbooks but real books written in engaging words by someone who LOVES the topic.
These books are the next best thing to actually experiencing science hands on.
You can visit the library with a list of books you want or you can do what I do and just basically clear the shelf of every thing on a certain topic. It’s okay to get more than you need!
You will need a variety of books, such as:
- Story-like, non-fiction books, that are meant for kids to read or listen to. Some of my favorites are:like the Jump into Science series, National Geographic Kids Readers, and Jerry Pallotta’s ABC series.
- Reference books for kids. Some of my favorites are the DK Eyewitness Books, National Geographic Kids,
- Resource books for you like Janice VanCleave’s Science for Every Kid series.
- Fiction books with a non-fiction slant (like The Magic Tree House)
Don’t forget to check your book shelves at home or borrow from friends with resources too!
You may need to take a couple trips, but getting as many books as you can on that first trip makes things much easier.
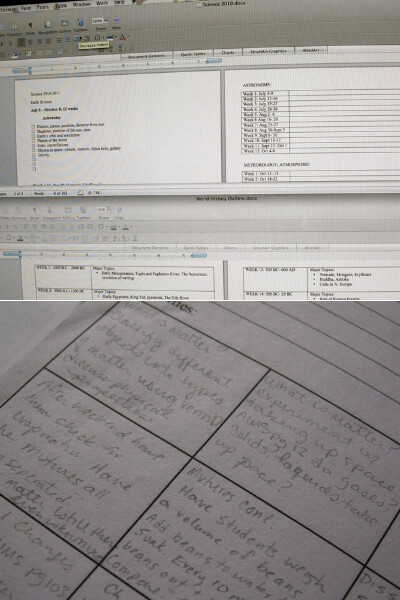
Step 4: Divide Your Topic into Sub Topics
Now you are ready to really start planning. Use all of the resources you have collected up until this point (curriculum standards, books, etc) to help you divide your topic up into subtopics to fill up the weeks.
For example, when was working on a Rocks and Minerals unit, I knew we were going to study rocks and minerals for 6 weeks. So I needed subtopics to cover that time frame. Some of my subtopics include types of rocks, properties of minerals, rocks in the real world, etc.
Your reference books are helpful since most of the time they are already divided up- all you have to do is look through the table of contents of a few of your books and you should get a pretty good list of sub-topics. (I like to cross reference all my books and mark down page numbers for similar topics in different books at this step as well).
Think about your overall goal for your science unit study. What do you want your kids to take away from this? What would the most important questions be? Those are your subtopics.
Some topics will be covered in a day, some more than one.
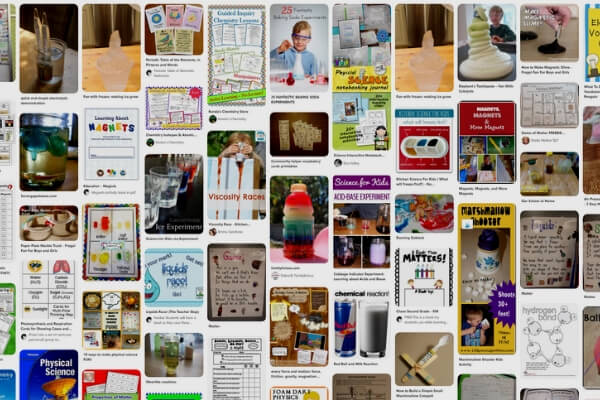
Step 5: Find Your Activities and Projects
Now it’s time to actually figure out all those fun hands on experiments, projects, demonstrations, and activities!
Here are a few places to find activities for your science unit study:
- Your resource books (ie. 101 Chemistry Experiments for Kids)
- Pinterest ( an easy and visual way to search for projects)
- Google it!
Pin, bookmark, cut/paste into a Google doc any and all ideas you find that look like interested activities and lessons. Look for things like:
- Notebooking pages
- Lapbook templates
- Journal prompts and writing assignments
- Interactive websites
- Experiments
- Demonstrations
- Reading assignments
- Posters
- Field trips
- Art projects
- Documentaries
All of this might not make it into the final lesson plan, but it’s always better to have more than you need than less and you will be glad you saved it all just in case.
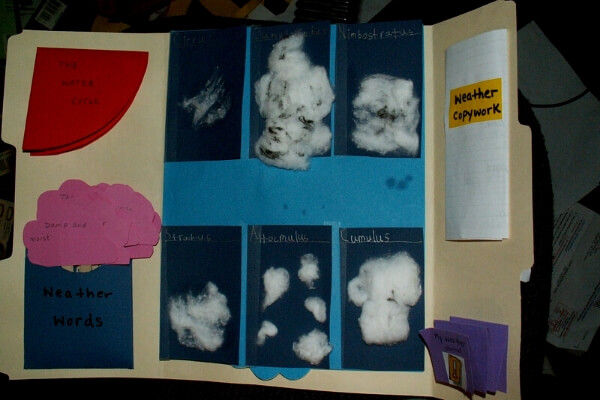
Lapbooks are a fun, hands-on way to put all of your unit information together in one place
Step 6: Write the Lesson Plan
And finally, it’s time to put it all together.
My favorite place to do this is on the computer using Word or Google Docs. But if you are a pen and paper kind of planner, then that’s fine too. You do need to get it all down somewhere- believe me trying to pull off a successful unit study by winging it won’t turn out that great!
You already have all the pieces, such as the topics to cover, how long to spend on each topic, activities, and book pages, now you are taking all of those pieces and putting them down onto a concrete schedule. Start a page or document for each day and start assigning the topics and assignments to go over that day. Enter all information you think you will need.
Add things like:
- Exact pages to read aloud
- Silent reading assignments
- Writing assignments or journal work
- Hands on activities or demonstrations
- Field trips to take
- Lecture notes for yourself
Basically all of that information you gathered in step 5 needs to be organized and divided into the correct subtopics and assigned to a day. It’s up to you how in depth you go and how many activities you do.
You may also want to include things like a supply or prep list so you can plan ahead and make sure you have everything on hand and ready when the day comes.
And that’s the basics of creating your own homeschool science unit studies! They are a great way to give your kids a learning unit that excites and interests them and encourages their love of learning!
You May Also Like:
How to Homeschool with a Toddler in the House- 5 Simple Tips!
A Quickstart Guide to Homeschool Styles (+ How to Choose)
How to Make Long Term Homeschool Goals for Your Kids
My professor asked me to creat a unit science project for my students and make it my own wjay does she mean she only said think it as of science